
Quick Summary
This document has a series of screenshots along with explanations, that will walk you through an example of setting up a MikroTik as the PapaBear Master.
The basic config strategy is: Wisp AP/Bridged.
Translation: it’s a WiFi Access Point to an existing network, where all the traffic is bridged to the existing router.
In practice then, users can connect to this Access Point in the standard way, and it’s all one big happy (common) network. The key thing is that the usual discovery tools will find all CDC boards that are up and connected.
Also note this SAME EXACT configuration works with WiFi-to-WiFi connections
Install ‘Winbox’
Winbox is a configuration tool from MikroTik.
Up towards the top of that page, click on the ‘Winbox’ button, which is really a drop-down. When it drops down, the version of Winbox will be shown. At the writing of this document, the version was 3.16. Click on it, let it download, then move it to the Desktop for easy access.
Start with a known Router Configuration
Here are the steps:
- Start with MikroTik not powered
- Get a small screwdriver or similar, use it to hold down the Reset button
- With reset held down, power on the MikroTik (you need 3 hands!)
- When Leds start to Blink (watch for them), release the Reset button
- Wait about 15 seconds. Good to go.
Initial Connections
Plug the ethernet of the MikroTik in to your existing network.
Plug into an existing port on your switch or your router. The discovery of the MikroTik device seems to work better when it is plugged in.
You could also plug the ethernet direct in to your PC. I have verified it works too.
Use Winbox to Discover and Connect
Double-Click on Winbox, and let it run. Click on the ‘Neighbors’ tab, and the MikroTik should be discovered:
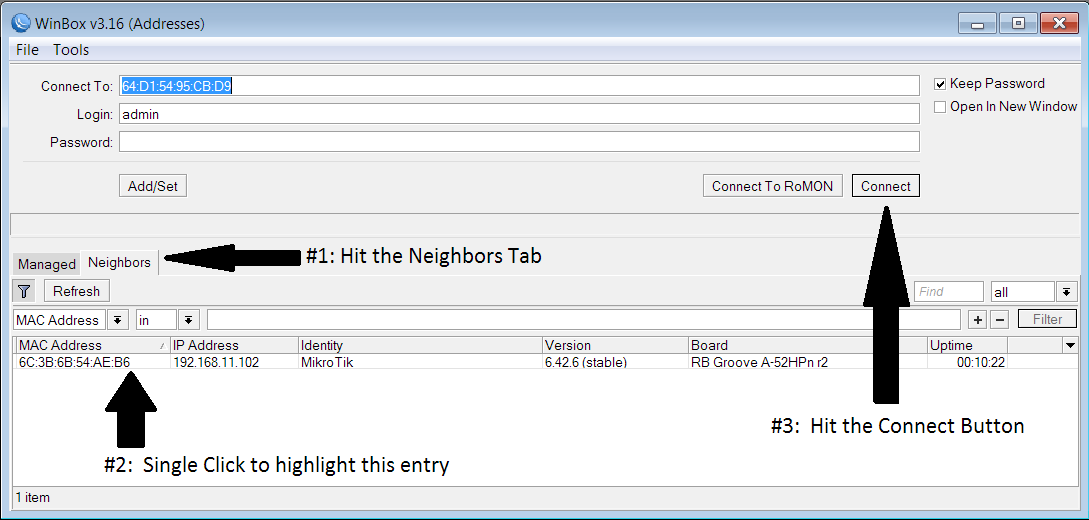
It should self-discover. Hit ‘refresh’ a few times if you don’t see it.
Once it shows, Single Click on that entry to Highlight it, then hit ‘Connect’.
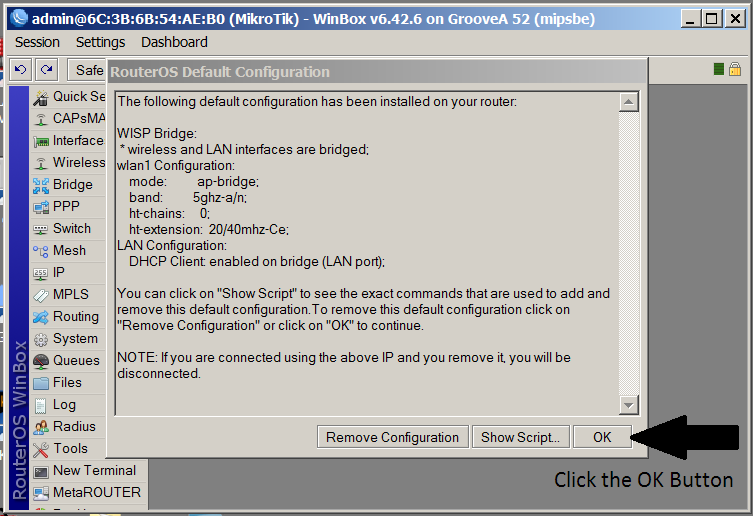
Screen for the 1st connection
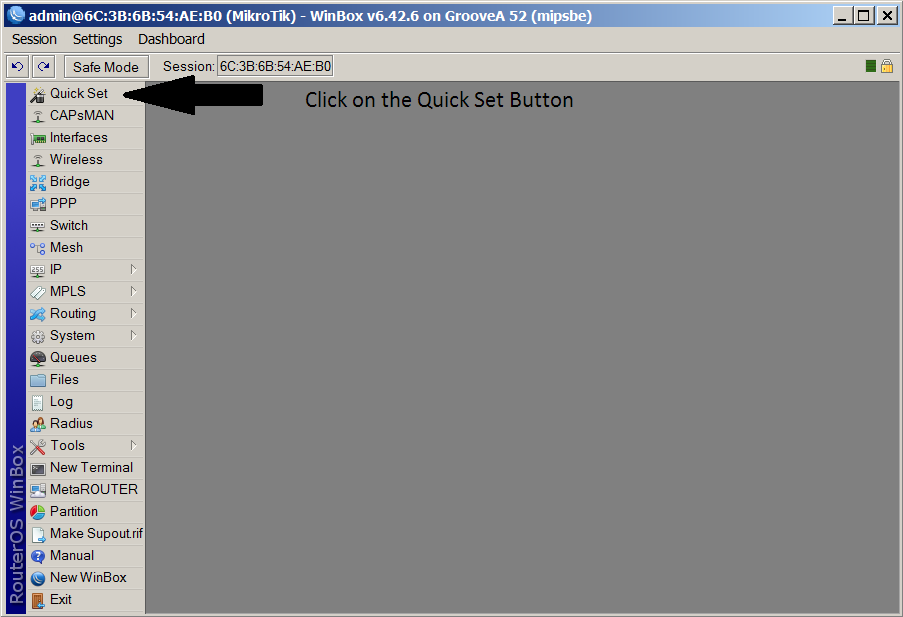
Click on ‘Quick Set’ to start the Configuration
Change Name, Country, and Band
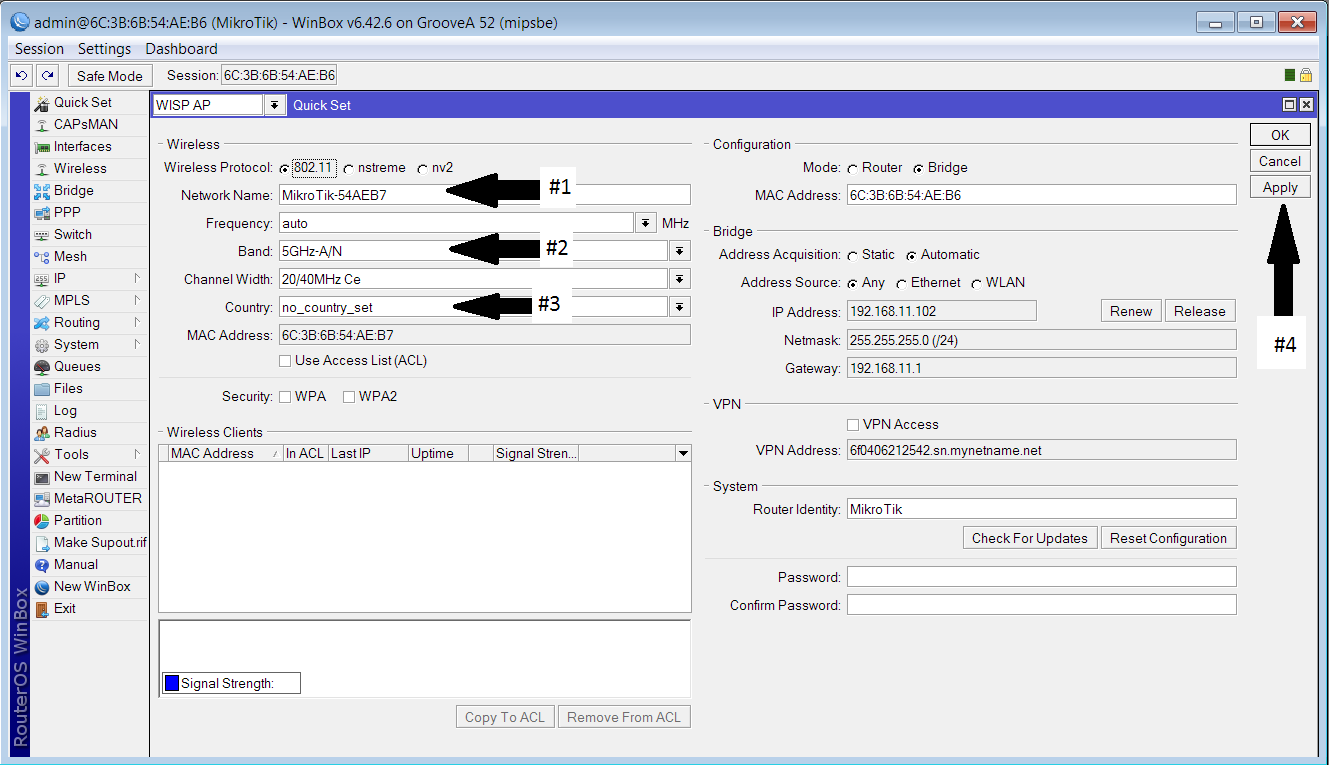
Step 1. Change the Network Name to PapaBear_something. Where ‘something’ could be the last 4 digits of the MAC.
Step 2. Change the Band to 2GHz-B/G/N
Step 3. Change country to United States
Step 4. Hit Apply. Re-connect if winbox loses communications with the unit.
Add WiFi Password
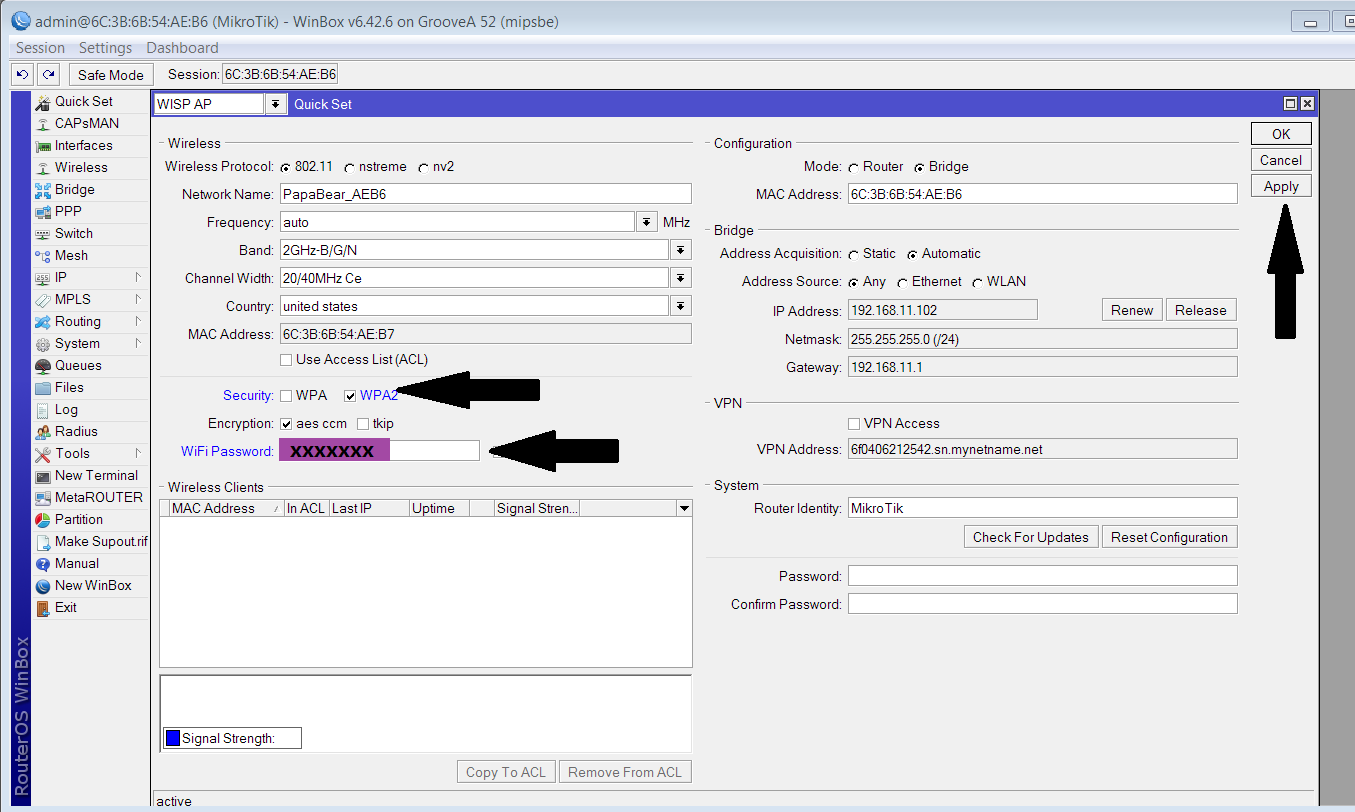
Choose ‘WPA2’ as the Security Type.
Enter the WiFi Password, then click on Apply
Configure as Bridge
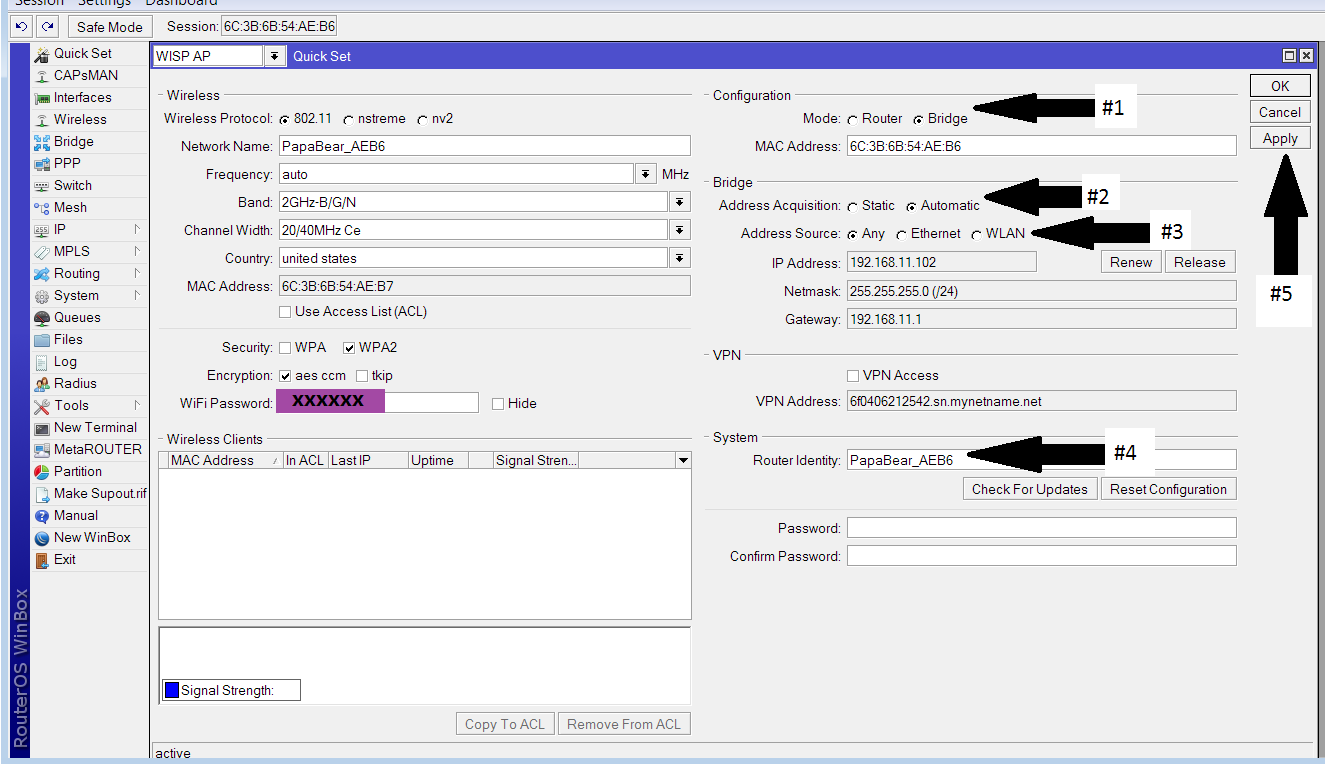
For Mode, select ‘Bridge’
Address Acquisition is ‘Automatic’
Address Source is ‘Any’
Change the Router Identity to the same as ‘Network Name’. This will be the name that shows up in the DHCP clients’ table on the router.
Click Apply. Almost done.
Enter Password for Router
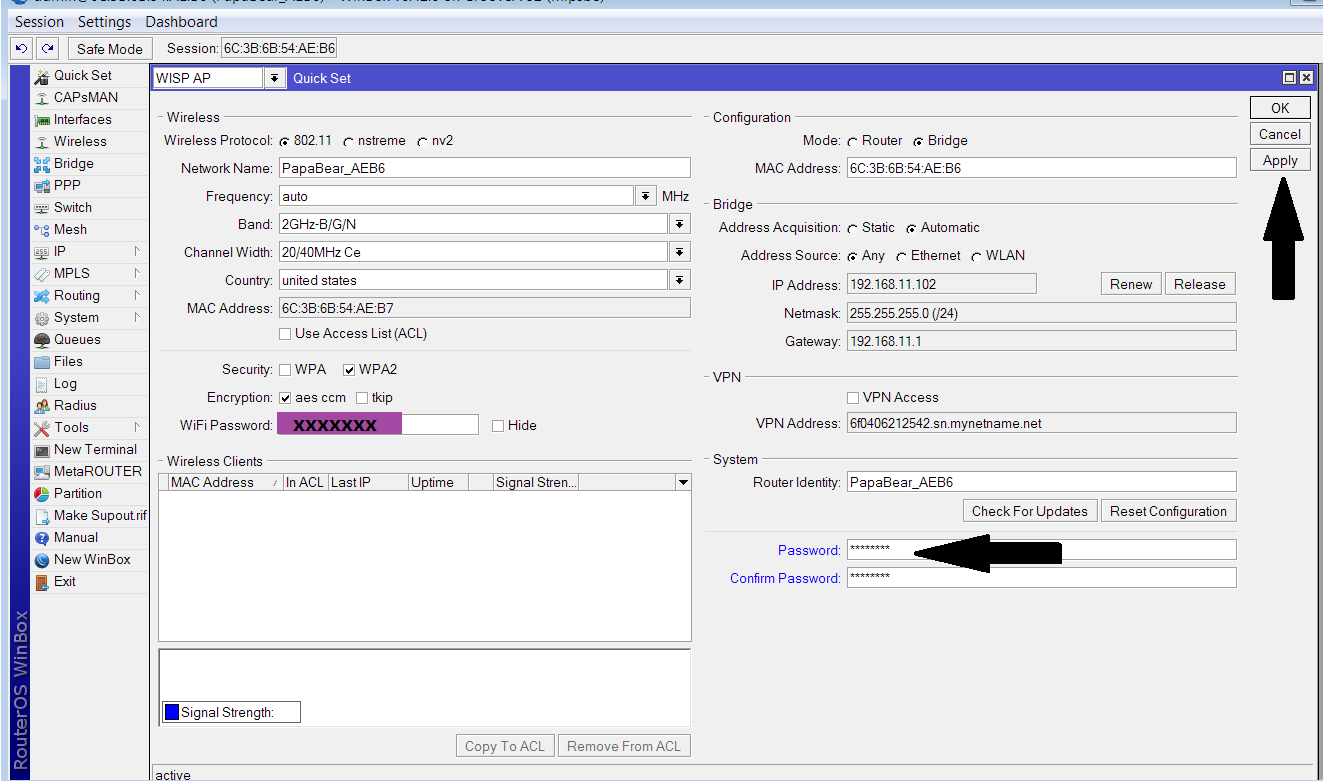
Note this is not the WiFi password: this is the Password that allows you to edit this configuration.
Enter the Secret Password. You should know what it is.
Hit Apply.
You’re done. You can hit ‘OK’, and exit out of Winbox.
Your PapaBear Router should be configured.